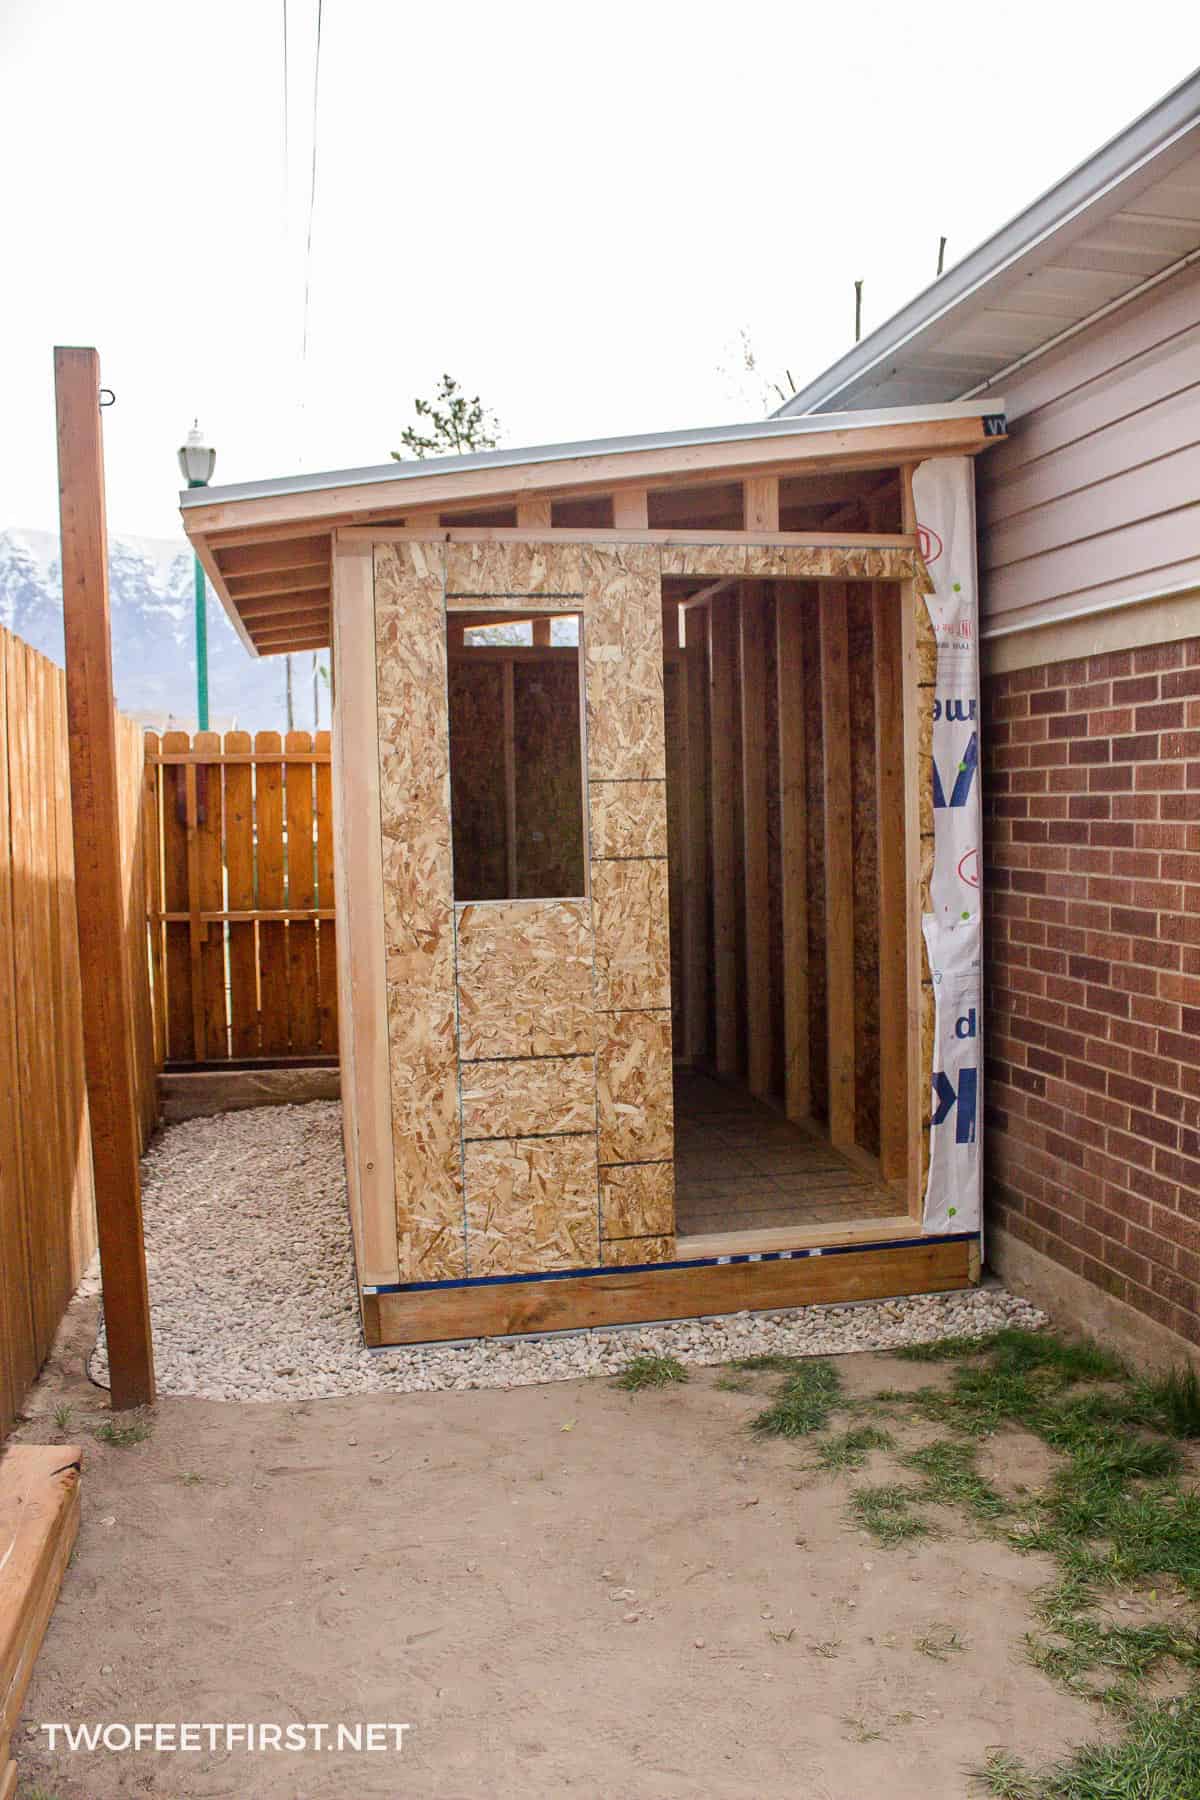
Alright, folks, let's talk sheds! Building a lean-to shed is a fantastic way to add some extra storage space to your backyard, and it's a project that even a novice DIYer can tackle.
Step 1: Planning and Preparation
First things first, you need a plan. How big do you want your shed? What materials are you going to use? Do you want to have a floor? These are all important questions to answer before you even start digging. I recommend sketching out a rough plan on paper. It doesn't have to be fancy, just enough to get a visual of what you're aiming for.
Now, let's talk location. Choose a spot that's level, well-drained, and ideally close to your house or where you'll be using it most. Once you've got the location figured out, mark it out using stakes and string. This will help you stay on track as you build.
Step 2: Foundation
There are a few options for a foundation, and the best choice depends on your budget and the soil conditions in your yard.
Concrete slab: This is the most durable and long-lasting option, but also the most expensive.
Concrete blocks: These are a good middle ground option. They're easier to install than a slab and provide a solid base.
Pressure-treated wood: This is the most budget-friendly option, but it requires proper treatment to prevent rot and insect damage.
Step 3: Framing
Now for the fun part! You'll be building the frame of your shed using treated lumber. Start by building the back wall. This is essentially a rectangle made of studs and a top plate. Make sure to use a level and plumb bob to ensure the wall is straight and true.
Once the back wall is done, you can move on to the side walls. These will be attached to the back wall, and they'll also have a top plate. If you want a roof overhang, make sure to extend the top plates of the side walls beyond the back wall.
Next, you need to build the roof rafters. These are the beams that support the roof. The number and size of the rafters will depend on the span of your shed. For a smaller shed, you can likely get away with 2x4s.
Once the rafters are in place, you can attach the roof sheathing. This is usually plywood or OSB. Remember to leave a bit of overhang on each side to protect the walls from the elements.
Step 4: Sheathing and Roofing
After the frame is built, it's time to start covering it up. You'll need to use sheathing material like plywood or OSB to cover the walls and the roof. This provides a solid base for your siding and roofing.
Next comes the roofing. There are many options available, but some popular choices for sheds include asphalt shingles, metal roofing, or even rubber roofing. Don't forget to install a ridge vent on the roof to allow for proper ventilation.
Step 5: Siding and Finishing Touches
Finally, you can add the siding. This can be anything from simple plywood to more stylish options like vinyl or cedar. Remember to apply a coat of weatherproofing paint or stain to protect the siding.
Finishing touches:
Door: You'll need a door for access to your shed. You can purchase a pre-made shed door or build your own.
Window: A window can provide some natural light and ventilation.
Trim: Add trim around the windows, doors, and corners for a polished look.
Shelving: Install shelving inside the shed for organized storage.
Important Tips and Tricks
Don't rush it: This is a project that takes time. Take your time and do it right, or you'll end up with a flimsy, poorly built shed.
Use the right tools: A level, plumb bob, tape measure, and a circular saw are essential for this project.
Double check your measurements: Make sure everything is square and level before you start attaching anything permanently.
Safety first: Wear eye protection, gloves, and hearing protection when using power tools.
Finishing Up
Once your shed is built, give it a good clean, and enjoy your new storage space. I hope this guide has helped you understand the basics of building a lean-to shed. Remember, it's not as complicated as it seems, and with a little bit of effort, you can have a sturdy and functional shed for years to come!
Now, get out there and start building!
Another Post you may like:
No responses yet for "Practical diy tips for constructing a lean-to shed"
Post a Comment
Note: only a member of this blog may post a comment.